Recently I posted about the new location for creating and managing your Attack Surface Reduction (ASR) rules. Today we’re going to look at one of them and the great information that is provided in Defender for Endpoint, which is part of Microsoft 365 Business Premium and other licensing packages that include security.
If you’re wondering how to get started with the Defender for Endpoint, the first step is to onboard your devices. I’ll write another post about that. Meanwhile, let’s assume that your devices are onboarded but even if they aren’t you can still push the setting that I’ll describe in Endpoint Manager.
Windows Defender Vulnerability Recommendations
Because it can do so many things, Windows Defender can be intimidating. The use of an Endpoint Detection and Response (EDR) tool is complicated. So to get started using it, let’s start with taking its recommendation on to protect our devices.
After onboarding, Defender will scan the computer for malware, vulnerabilities and inventory. Then you’ll start getting recommendations on software to update, yes even third party, and configurations to apply to reduce the device vulnerability.
You’ll find the recommendations under the Endpoint section of the main menu.

Click on Recommendations to see the list of things that need doing. Here’s you’ll see a long list of items of different types. Below is a sample of the types of things that you’re likely to find in that list.
Here we see a recommendation to update Microsoft Office on Windows for 3 weaknesses. Notice that under the Threat column that the bug icon is not red. This means that there are no known threats in the wild for these weaknesses. The graph represents the history of this weakness in your environment over time and the Remediation type gives you an idea of what you’ll have to do to correct it.

Block persistence through WMI even subscription
Let’s take a look at this one. It’s an Attack Surface Reduction rule and it is exploited in the wild, so it’s import to close up this vulnerability to fileless attacks. Click on that alert brings us a lot of information

We get a description of the problem in the potential risk section.


We get a user impact statement which is great because it lets us know how disruptive it is likely to be to apply this security control to the devices. Security is always about walking a line between secure and productive. Businesses want to be productive and they also need to be secure. Today we’re lucky, Defender tells us that this update isn’t expected to have any user impact.
Now it’s time to apply the configuration.
Endpoint Manger
Navigate over the Endpoint Manager, then click on Device Security. Finally, select Attack Surface Reduction rules.

Press Create policy and then select the OS and Profile type.
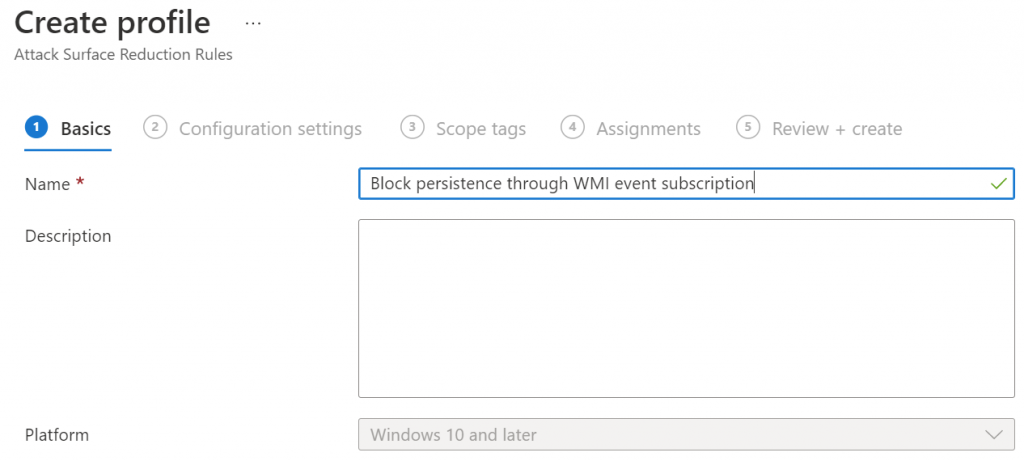
Give the policy a name. I prefer to give it the same name that Defender for Endpoint has provided in the vulnerability recommendation.

Find the policy that you want to configure and change it to Block. Leave the others at not configured.

Assign the policy to All Users and then save it.
Now you just have to continue to work your way through the vulnerability list. Most people are going to be surprised at the length of the list of items that need to be done. Working your way through the list is easier said than done but once you get through it the first time, keeping up with it isn’t as time consuming.
If you like this content please join our Endpoint Manager, Lighthouse & Defender group. https://www.facebook.com/groups/endpointmanager
All we do is support IT professionals. Microsoft 365 technical assistance, Super Secret News, Security community, MSP Legislation community, EndPoint, Defender and Lighthouse community, Peer groups, Kits, papers, Business consulting and more. https://www.thirdtier.net


